Here are tips and tricks on the use of RDSwin, including answers to FAQ’s. Most of these initial tips are available in the pop-up User’s Manual, so the first tip is…Read The Manual! If you have specific questions or tips to suggest, send them to Aircraft Design Research LLC .
- Installing RDSwin
- RDSwin Desktop Shortcut
- Always Store Your RDSwin User Files in Your Windows User Folder
- Running under 64-bit Windows
- Running under Linux or on a MAC
- If RDSwin won’t run
- RDSwin is Cut Off to Right or Bottom or Doesn’t Fill Window
- Recovering Design Layout Module files after abnormal termination
- I can’t see anything in a Graph or Design Layout View
- How to capture RDS graphs and drawings
- RDS won’t Print anything
- RDS Units Conversion
- No-Lateral-Symmetry Designs (like Rutan’s Boomerang)
- How do I input an airfoil in the Design Layout Module?
- RDS-DLM acts strange when I change geometry type
- I designed an airplane in MKS when I thought DLM was in FPS units
- Does RDS make drawings for me to build my design?
- Proper use of “Design Lift Coefficient” in Aerodynamics Module
- Propeller Analysis – Thrust Correction Tricks
- What are the differences between RDS-Pro and RDS-Student?
- Raymer’s Secret RDSwin Hacks
- RDSwin Bug Alerts
- Where are the old RDS-DOS Tips and Tricks?
(Note: the information below is provided with the best of intentions but please consult an expert before modifying any computer settings. This website, ADR, and D. Raymer assume no liability if these suggestions don’t work or cause other problems!)
Installing RDSwin
To install RDSwin, just click on RDSwinInstall.exe on your CD-ROM. Run it, and then follow instructions.
Or, you can do the installation yourself. Just copy the entire CD-ROM into your computer”s root directory (C:\). This will create a new directory C:\RDS-win, plus several needed subdirectories, and fill them with the program and associated files.
Today”s computers have a wide range of security software to protect against viruses and malicious software, and to protect companies from installation of unauthorized or pirated software on their computers. Depending upon the security methods in use, there may be problems getting RDSwin to run the first time. Since RDSwin is not used widely enough to be flagged as “normal” by security software, it may be flagged as “suspicious.” If so, you may have to open the security software and give RDSwin permission to run. You may need to install RDSwin while logged on to Windows as “Administrator.” You may need to “Unblock” it using My Computer or Windows Explorer. Right-click on RDSwin.exe, go to Properties, and click UnBlock.
RDSwin is not intended to be installed on a network and will almost certainly not work if that is attempted. The license specifically prohibits this, so don”t be surprised when it doesn”t work!
If you are installing RDS-Professional, the first time you run it a message will appear with an alphanumeric code generated from parameters in your computer system. Email this to the address provided and an unlock code will be sent to you. This must be entered only one time.

RDSwin Desktop Shortcut
To set up a Windows Shortcut, use My Computer or Windows Explorer. In the main RDS directory (default is C:\RDS-Win), find and right-click on the program file RDSwin.exe, and select SendTo-Desktop. Now you can click on the Shortcut icon to start RDSwin. It looks nicer if you right-click on the Shortcut icon, select Rename, and change “Shortcut to RDSwin.EXE” to simply “RDSwin”. You can also change the shortcut Icon. Several Icons with various colors can be found in the RDSresource directory with filenames such as RDSwinIconGreen.ico.
Always Store Your RDSwin User Files in Your Windows User Folder
Windows System Restore, a nice utility to have when your computer starts acting strangely, can unfortunately “restore” your RDSwin design files to the old copies from weeks ago. During a Restore, files on your computer revert to the versions at the last Restore Point except those that reside in your own Windows User Folder. So when saving your RDSwin design files, you should create and use a directory at C:\Users\[yourusername]\RDSUser\. (The C:\Users\ part may be different for your version of Windows – look for something similar.)
If you’re still using C:\RDS-Win\RDSUser\ for your design files and haven’t saved the latest versions to a CD or memory stick, you can recover your files after an unexpected System Restore using the free ShadowExplorer program. PCWorld reviewed it favorably and has a download link at www.pcworld.com. After you install ShadowExplorer, you may need to run it while logged in as system administrator.
Or, you can Undo the Restore, save the files to CD or memory stick, and then Redo the Restore.
But why go to all the trouble? Do what Windows demands – save your files in your User folder. That’s what it’s for.
Running RDSwin under 64-bit Windows
…should be no problem for a 32-bit application like RDSwin. According to the Microsoft website , ‘Most programs designed for the 32-bit version of Windows will work on the 64-bit version of Windows. Notable exceptions are many antivirus programs (and) device drivers designed for the 32-bit version of Windows’. RDSwin isn’t an antivirus program and it doesn’t contain its own device drivers, instead using the ones installed on your computer for printer, monitor, mouse, and the like.
If you do experience trouble, try adjusting the compatibility settings. Right-click on your RDSwin shortcut and go to the Properties-Compatibility tab. If that doesn’t work, you may need to run with Administrator access. Right-click on your RDSwin shortcut and select “Run as Administrator”. If that fixes it, set the program to always run that way. Go to Properties-Compatibility tab and check the box “Run as Administrator”.
If all else fails you may need to run through a 32-bit emulator but that shouldn’t be the case.
Running RDSwin under Linux or on a MAC
RDSwin can be run under Linux or on a MAC using WINE, a free open-source program that allows Windows programs to run on non-Windows computers. You aren’t supposed to call it an “emulator” and in fact, WINE is said to be an acronym for “Wine Is Not an Emulator.” The WINE website calls it a “compatibility layer capable of running Windows applications on several POSIX-compliant operating systems.” Whatever. It works, and it’s free.
RDSwin-Professional will probably not work under Linux or on a MAC due to the security system employed. Potential customers should contact CRC to discuss options. Or just purchase a cheap low-end PC for running RDS!
If RDSwin won’t run
RDSwin has built-in error checking for likely problems, with pop-up descriptions to help you resolve any issues. Hopefully the suggestions below aren’t needed…
Nothing Happens on First Use:
The most obvious problem – no offense – is that you have copied RDSwin from another computer rather than installing it from an original CD. Don’t do that. Another possibility – you have somehow deleted or corrupted some of the required DLL’s and resource files. Reinstall from the original CD. And another – your security software doesn’t like RDSwin and is stopping execution but isn’t warning you. See above discussion of installation.
Nothing Happens, or Main Menu Page Opens but Nothing Works:
You may have a bad RDSCONFG file, caused by an irregular termination or incorrect installation. RDSwin can’t “find itself” because that file indicates what directory to look in to find needed resource files and images. The solution is simple – exit and delete the file RDSCONFG.RTD from your RDS directory, then restart RDSwin . A new file will be created.
On First Use RDSwin Says You have a Joystick – but You Don’t:
This may also be caused by a bad RDSCONFG file (see above). If that doesn’t fix it, use Notepad to open file RDSwinParams.RTD in the RDSresource subdirectory. Set the parameter JoyBreakout to minus one (=-1). This tells RDSwin to skip the check to see if there is a joystick, which seems to be returning “maybe” instead of “no.” When saving the change make sure that Windows saves it in the same location as RDSwinParams.RTD and doesn”t change the extension to ( .TXT) or (.RTD.TXT).
RDSwin Won’t Run, or Strange Termination Errors Occur:
If RDSwin will not run or you get strange termination errors when saving a file or selecting a command, one possibility is that Windows has mysteriously set the attributes of some needed files to Read-Only. Go to Windows Explorer and highlight all the files in your RDSwin program directory. Right-click, select Properties, and make sure that Read-Only, Archive, and Hidden are not checked. Also do this for the RDSresource subdirectory.
Another way to fix this – open the command box (Start-Run) and enter C: attrib -a -r -h RDSwin (assuming your RDS program directory is C:\RDSwin as recommended).
RDSwin is Cut Off to Right or Bottom, or Doesn’t Fill Window
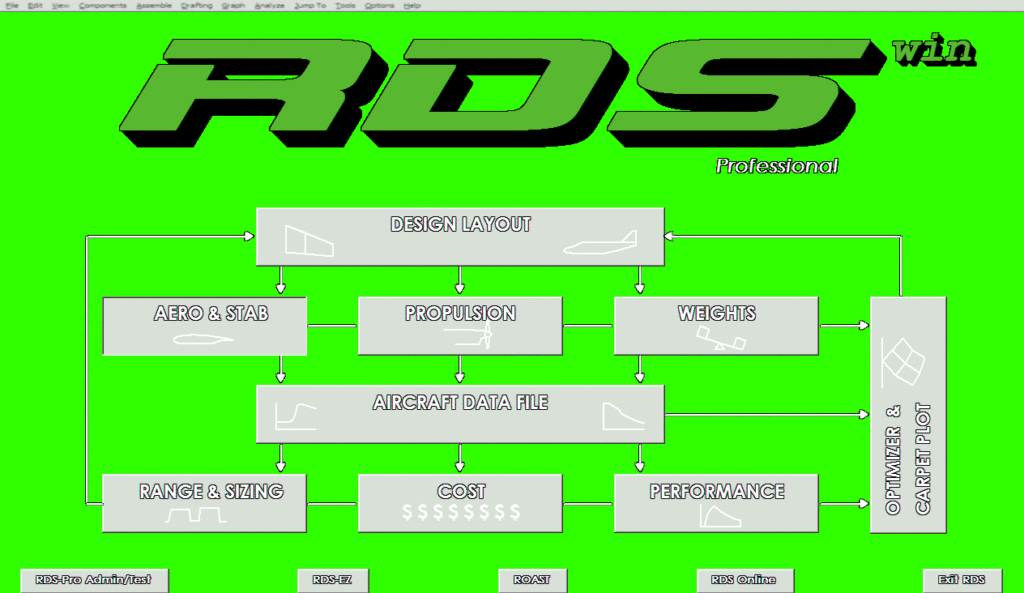
Some computer screens or resolution settings might clip off the bottom or right side of the RDSwin Window. This seems to be especially problematic for older versions of RDSwin running in Win10. You should see a row of buttons at the bottom of the main screen including one labeled “Exit RDS”. To the right, RDSwin-Student should show a shameless advertisement link for Dr. Raymer’s textbook upon which RDSwin is based. In RDSwin-Pro there should be a button taking you to the Optimization Module.
If these are missing or cropped, first try this: Right-click on screen, select Properties (or Display Settings). Look for ‘Change the size of text,…’ and make sure that it is set at 100%. If it isn’t found as a Shortcut setting, go to your Systems Settings, Display, and set it at 100% (recommended by Windows anyway). You may have to restart your computer to make it apply properly. This almost always solves the problem, if it was set to something other than 100%.
If not, right-click on your RDSwin shortcut and try the following, in this order:
- Layout – Let System Position Window (normally checked already)
- Options – Use Legacy Console (usually this one does the trick)
- Compatibility – Override high DPI scaling behavior (or may say Disable Display Settings on High DPI settings)
- Compatibility ” Disable fullscreen optimizations
- Compatibility – Compatibility for Win8,7,or XP
- Change the screen resolution (caution: that may impact your other programs)
A final method is to go to the RDSresource subdirectory and open file RDSwinParams.RTD using NotePad (not Word). Find {ConXsizemult=1.0} and {ConYsizemult=0.99}, and change them to =0.95 or other numbers as appropriate. Save the file and restart RDSwin. Revise these values until the bottom buttons and right side image are fully visible. You can also try a smaller value of parameter {xShrinkWorld} in RDSwin Version 8.2 and higher. This allows both width and height of the Window to be adjusted. This only has to be done once.
These adjustments, especially Use Legacy Console, will usually fix another rare problem where the RDSwin screen is not filling the whole window and is leaving unused gray areas below and to the right.
Recovering Design Layout Module files after abnormal termination
If you have been working in the Design Layout Module and RDSwin should abnormally terminate for some reason, your most-recent design edits can be recovered. Just start RDSwin again and click on Yes when asked if you want to save the recovered file. Go to your RDSuser folder and open it, then if you wish, save it using the correct filename. Note that if you reply No, the recovered file is immediately erased.
I can’t see anything in a Graph or Design Layout View
Maybe you have the background and line colors set to the same color. Fix in Options-TextAndLineColors.
How to capture RDS graphs and drawings
RDSwin creates graphs and drawings which can be used in such Windows programs as PowerPoint(tm) and Word(tm). In the pulldown menu File options you can select SaveScreenImage (bmp or jpg), or Copy the screen image to the Windows clipboard. In Graphs or the Design Layout Module you can instantly created a bitmap image file by pressing “B”, and you can copy to the Clipboard by pressing Ctrl-C.
RDSwin won’t Print anything
It should. Make sure your default Windows printer is working properly then try again.
RDS Units Conversion
RDSwin is fully capable in both SI Metric (MKS) units and in units of the British Imperial (FPS) type. In the FPS units RDS uses thrust in lbs., C in 1/hr, altitude in feet, and velocity in either knots or Mach Number. In the MKS units RDS uses thrust in kN, C in mg/Ns, altitude in meters, and velocity in either km/hr or Mach Number. Note that it is not necessary to identify whether knots (or km/hr) or Mach Number are used because RDS assumes that any velocity values less than 10 were given in Mach Number.
You can enter inputs in MKS or FPS, and can switch at will between them by selecting units from the OPTIONS menu. Or, you can instantly switch units by pressing `#’ (the pound sign) anytime RDS is waiting for a numerical input.
No-Lateral-Symmetry Designs
An RDS-Professional customer known for unusual but successful designs has asked about designing aircraft with no lateral symmetry plane – including the wing. In such a design the wing may have different trapezoidal geometries for left and right side, and those sides may not even join at the aircraft “centerline” but at some arbitrary Y-location.
To facilitate such designs, the Design Layout Module allows wings and tails to reflect across their own root chord rather than across the aircraft centerline as is the usual practice. This allows a wing or tail which is laterally symmetric but is not centered on the aircraft’s centerline.
For a truly wild design, completely different left-right wing panels can be separately created and placed. Create each separately, selecting “One Side of Global CL” when prompted for symmetry. Enter desired areas, aspect ratios, and taper ratios as if each wing panel would be reflected across the global centerline. In other words, if you are creating the left panel which is to have an area of 50 by itself, enter 100. When creating the wing panel for the right side of the aircraft, again enter double the area, but use a negative value when entering aspect ratio. This will invert that wing panel to the other side of the aircraft. You can instead use positive aspect ratio when creating the right-side wing panel then later scale it by X=-1. Another approach – create the left-side panel, copy it, scale it by X=-1, then make whatever other changes are needed.
The reason for treating these one-side wing panels as if they were part of a complete wing is simple – it allows converting from reflected to nonreflected and back again without changing the wing trapezoidal geometry.
For weights and aerodynamics analysis you must CAREFULLY review and revise the geometric inputs estimated by the Design Layout Module in the output TAB file. It is suggested that the wing geometric inputs be defined assuming an equivalent total trapezoidal planform based on the total wing area and total span, the total exposed wing area, and an averaged sweep, taper, and thickness.
How do I input an airfoil in the Design Layout Module?
The Design Layout Module reads airfoils in from tables. For student usage one of the stored airfoils already available should suffice for most designs. If you must use another airfoil, use WordPad to add a new airfoil to the RDS airfoil table where it will be available for use by the wing creation routine. Open file RDSAF.DAF and read the instructions. Make sure you save the table as RDSAF.DAF. Windows may try to add an extension such as RDSAF.DAF.TXT in which case RDS will still use the old version.
In the Professional version there is a point-by-point airfoil input capability which you can select instead of picking an airfoil. There is also a routine that will create NACA airfoils from a few simple inputs.
RDS-DLM acts strange when I change geometry type
The option to change Geometry Type in Component-Parameters is for experts only, and is not normally needed. It does not do any geometric conversion, it only changes the parameter that tells the drawing routines whether the stored component points represent SuperConics or are just surface points. For wings and tails, this parameter indicates the latter (=0), whereas for most other components it indicates SuperConics (=1).
If you want to convert a SuperConic component to Points, use MiscCompOptions-Convert. There is currently no capability to convert a Point component to SuperConics – you have to build it that way from the start. And, why wouldn’t you?
I designed an airplane in MKS when I thought RDS-DLM was in FPS units (or vice-versa)
Just scale the whole thing. Select all components. Then do Component-Scale, XYZ. Enter 0.3048 if you meant to enter FPS but DLM was set to MKS, or enter 3.28084 if you meant to enter MKS but DLM was set to FPS. DLM will scale locations around the selected leader as it scales the components, so you should pick a “Leader” component with location of (0,0,0).
Does RDSwin make drawings for me to build my design?
RDSwin does not put out drawings for fabrication. Such drawings are done on detail design CAD programs such as CATIA or SolidWorks. RDSwin does what these detail design programs cannot do – let you quickly put together an entire aircraft concept design then analyze and optimize it. When you’ve settled on an overall concept design, then you do the detail design on a different CAD program, or a drafting table if you prefer! RDSwin-Pro allows instant export of your design in IGES, DXF, and RhinoCAD formats.
Proper use of “Design Lift Coefficient” in Aerodynamics Module
Several users have had problems due to a misunderstanding of the notion of “Design Lift Coefficient”, or CL-design in the .DAA aerodynamics input file. This is NOT the maximum lift coefficient, but the lift coefficient at which the final wing design is supposed to have its BEST L/D. Typically this is about 0.3 to 0.5, and is usually near the cruise lift coefficient for obvious reasons. The airfoil is normally selected or designed to be best at this lift coefficient as well (see fig 4.9 in Raymer’s book).
Propeller Analysis – Thrust Correction Tricks
Propeller thrust corrections are normally applied, but can be skipped as follows:
- Tip Mach correction (Eq. 13.19) can be shut off by setting blade t/c=-1 (if set to 0, RDS assumes .03)
- Nacelle Blockage correction (Eq. 13.18) can be shut off by setting Nacelle X-area=0
- D/q-Cooling correction (Eq. 13.21) and D/q-Misc correction (Eq. 13.22) can both be shut off by setting Fudge-Misc=0
What are the differences between RDSwin-Pro and RDSwin-Student?
RDSRDSwin-Professional and RDSRDSwin-Student are related and are actually compiled from the same 120,000+ lines of source code. When RDSwin-Student is compiled, many features are skipped by a compiler meta-command, which also makes certain changes that reduce the accuracy of results. An important difference is the license agreement. RDSwin-Student is licensed only for student use, and is priced accordingly. More information and a comparison between RDSwin-Pro and RDSwin-Student can be found here.
Raymer’s Secret RDSwin Hacks
As we all learned from the classic movie Wargames (“…shall we play a game?…”), we computer programmers cannot resist the urge to install “backdoors” and other hidden code. I’ll reveal a few, as I feel like it, starting with:
- Click Help-About RDSwin. Click it several times. Strange messages may appear, a few lines down. Or not.
- Entering the exclamation mark ! from almost any menu or prompt will immediately terminate RDSwin. All work is lost except recent edits to your design layout (DLM), so be careful with this!
- In any Design Layout Module View, pressing the Underscore _ (looks like a slicer) will render that design, but slowly. You’ll see it start from the farthest away point, drawing every panel of the display as it moves forward, including all internal components. Pressing the backslash \ allows you to take a slice through the current view, with location defined as percent of display depth into the screen. Fun, but not very useful.
- In the Design Layout Module, press * to calculate and show the equivalent NURB/Bezier middle point in Shape One Cross-Section. You cannot grab and move it, since RDS uses different mathematics in which the middle point is actually on the curve. This secret hack lets you see how lucky we are, that this is the case.
- In the Design Layout Module, the number keys 1-0 define various canned views. Pressing `, to the left of 1, gives a Front View. This looks like a Rear View until you Render (R). Pressing -, to the right of 0, gives a nice 2-view where the side and top views are larger and more visible than in the 3-view made by pressing 6.
- In the Design Layout Module, press [ to toggle a listing of the current view’s roll-pitch-yaw, pressing [ again adds the coordinate transformation matrix, then again adds the scale factors used to create the display on screen. For CAD coding geeks only. Note that [ looks like a matrix bracket.
- Make sure your speaker is on, then click on the big RDS on the main menu page. Try it several times.
- When displaying inputs or results using the RDS Console (List&Print-DisplayOnRDSConsole), you normally toggle through the available color schemes by pressing C until you see colors that you like. Instead, try the secret hot keys, namely the letters J (Jamaica), G (Germany), A (America), I (Irish), V (Viking), W (white&black), and B (blueprint). Pressing the same secret key a second time will return to the previous scheme.
RDSwin Bug Alerts
Bugs, Mr. Rico. Zillions of em!
BUG ALERT 6: Windows 10 includes some deep changes to its routine for providing screen information to a program. For some computers using certain settings, the RDSwin screen may not cover the whole window leaving unused gray areas below and to the right. The big ‘RDS’ and other text on the main screen may be wrongly sized, and it may even have trouble ‘catching’ mouse clicks.
First try the compatibility mode and other settings as described above (RDSwin is Cut Off to Right or Bottom). However, it may simply not be possible to get the older versions of RDSwin working properly in Win10. One option that seems to work for older versions is to install and run it through the Oracle VirtualBox (www.virtualbox.org/). This takes a lot of time to set up and slows down RDSwin. Purchase the newest version instead, to solve this problem and get a lot of new features and capabilities.
The newest version, RDSwin V10, has been released and is available in Student version from AIAA. The Pro version is available here. RDSwin V10 has many new features plus fixes to these Win10 problems. Beware – some online stores are still offering the old V8 or earlier. These will work poorly or not at all on Win10 computers.
BUG ALERT 7: An ancient bug. The DLM Insert Circle routine asks for Radius but treats the input number as Diameter. Fixed in V10.
BUG ALERT 8: Bug in the first release of RDSwin-Pro V10 – if a design has a component imported as an STL file, certain routines may work improperly for those components after that STL component. One example is the Component Tool to convert superconic surface comp to points. This is fixed in RDSwin-Pro V10.3.
Not a Bug, but: If you have a problem with the Install utility, it probably results from your security software. You may need to run the Install program as Administrator. You can also try turning off your security software during installation, or just use the alternative “copy everything” method described above. It’s easy.
Not a Bug, but: If you download a Selig airfoil from http://airfoiltools.com, the file will sometimes use LineFeed rather than CarriageReturn at the end of lines. You need to fix those before asking RDSwin to read it while creating a wing or tail. Try the ReplaceAll button in Notepad++ with Search Mode set to “Extended” and change LF to CR. Another option is to Open the file in Excel using Delimited>Space, then save it as a TXT file. Clumsy, but it works!
Not a Bug, but: If you upgrade RDSwin-Student to Version 10.5a using the download at https://aircraftdesign.com/rdswin-student/, you may find that you can no longer create a wing. Yikes! The problem is that certain RDS resource filename extensions started to be used by popular commercial software. To avoid conflicts, ‘rds’ has been inserted into filename extensions but the upgrade didn’t include the file holding airfoil data. The simple solution is to make a copy of RDSAF.daf and rename it RDSAF.rdsdaf. The next release, coming soon, won’t have this problem.
Please send Bug messages to AircraftDesign.Com . Be clear, be specific, and be nice!
Old Dead Bugs
BUG ALERT 1: The ShapeComponent problem is fixed for versions after V6.3.
BUG ALERT 2: The Quick Initial Sizing routine bug is fixed for versions after V6.3.
BUG ALERT 3: The problem with titles for the input grids for uninstalled turboprop engine data is fixed for versions after V7.0.
BUG ALERT 4: Problems with various metric inputs/outputs is fixed for versions after V7.1.
BUG ALERT 5: The old flight control weight calculation error for cargo/transport airplanes is fixed for versions after Version7.1.
Where are the old RDS-DOS Tips and Tricks?
Still running RDS-DOS? You might be the last one. Get RDSwin just as soon as possible. But if you are looking for the old RDS-DOS tips and tricks, click here.